Step-by-Step Guide: Installing Fedora on Your Computer
- By admin --
- Friday, 26 May, 2023
Installing Fedora involves a series of steps:
-
Download the Fedora ISO: Visit the official Fedora website (https://getfedora.org) and download the latest stable version of the Fedora ISO file that matches your system architecture (32-bit or 64-bit).
-
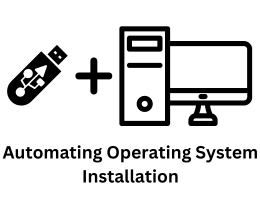
Create a bootable USB drive: Insert a USB drive (at least 4GB in size) into your computer. Use a tool like Rufus (Windows) or Etcher (Mac/Linux) to create a bootable USB drive from the downloaded Fedora ISO. Follow the instructions provided by the tool to complete the process.
-
Boot from the USB drive: Restart your computer and enter the BIOS/UEFI settings by pressing a specific key during startup (usually F2, F12, or Del). Look for the boot order or boot priority settings and set the USB drive as the first boot option. Save the changes and exit the BIOS/UEFI settings.
-
Start Fedora installation: Once your computer restarts, it should boot from the USB drive. The Fedora installation menu will appear. Select "Start Fedora-Workstation-Live" (or a similar option) and press Enter to begin the installation process.
-
Language and Keyboard selection: Choose your preferred language and keyboard layout from the provided options and click on "Continue."
-
Installation Summary: On the Installation Summary screen, review the options and customize them if needed. Here, you can configure options like installation destination, partitioning, network settings, software selection, and user creation. Click on each category to make changes and click on "Done" when finished.
-
Installation Destination: If you have unallocated space on your hard drive, Fedora will automatically detect it and propose a partitioning scheme. Alternatively, you can manually configure partitions by selecting the disk and clicking on the "+" button. Choose the appropriate partition scheme for your needs and click on "Done."
-
Network Configuration: If you're connected to the internet, Fedora will attempt to configure network settings automatically. If you need to make any changes, click on the network icon and enter the necessary information (e.g., IP address, DNS) manually. Click on "Done" when finished.
-
Software Selection: Choose the software packages you want to install. By default, Fedora selects a set of packages suitable for a general-purpose workstation. You can add or remove packages by clicking on the corresponding categories. Click on "Done" when you've made your selections.
-
User Creation: Enter your full name, username, and password to create a user account. You can choose to enable automatic login if desired. Click on "Done" when finished.
-
Begin Installation: Review the installation settings and click on "Begin Installation" to start the installation process. Fedora will begin installing the system and the selected software packages.
-
Configuration: While the installation is in progress, you can configure certain options. For example, you can set the root password, enable automatic login for your user account, and enable or disable the firewall. Once the installation is complete, click on "Reboot" to restart your computer.
-
Remove the USB drive: After the computer restarts, remove the USB drive from the USB port. Your system should now boot into the newly installed Fedora operating system.
Congratulations! You have successfully installed Fedora on your computer. You can now explore the features and functionalities of Fedora and start using it for your desired tasks.


